Custom Domains with SSL for Github Pages
In a previous post, we discussed how to set up a Jekyll-based blog to be hosted using Github Pages. The process is straight-forward, and also free! So, if you’ve ever had a desire to start blogging, have a look at the previous post, and join us back here once you’ve set up your blog!
Now you have a blog, and the world is loving your content. But you’re tired of handing out your nerdy github.io url (which I think is actually kind of cool). You want to solidify your blog on the internet. What steps should you take next? Absolutely, your next step is to create a custom domain from which people can securely access and share your content. We’ll show you exactly how to do this using domains purchased through the Google Domains service.
Configuring Github
The first thing you’ll need to do is tell Github that you plan on serving your site from your newly purchased domain name. To do that, visit your repository (created in the previous post), and click on the Settings icon. Then scroll down until you get to the Github Pages section, set the Custom Domain field to your new domain name, and hit save.


Now it’s time to configure our name servers to point to Github.
Configuring DNS
When you registered your domain through Google, it automatically set up it’s own name servers to handle the requests for your domain. However, since Github Pages does not allow SSL for custom domains, we are going to take advantage of Cloud Flare’s Universal SSL. This will allow users to connect to our site securely, using HTTPS.
Head on over to Cloud Flare and sign up for an account. After doing so, just follow the steps below to set up DNS records for your new domain.
Add a Website
Fill in your domain name and click Begin Scan.

This will request all of the available records for your current domain. The results should be empty if you have recently created your domain. You can verify any records found in the next step. Watch the video while waiting, it’s pretty good I guess :)
Verify/Configure DNS Records
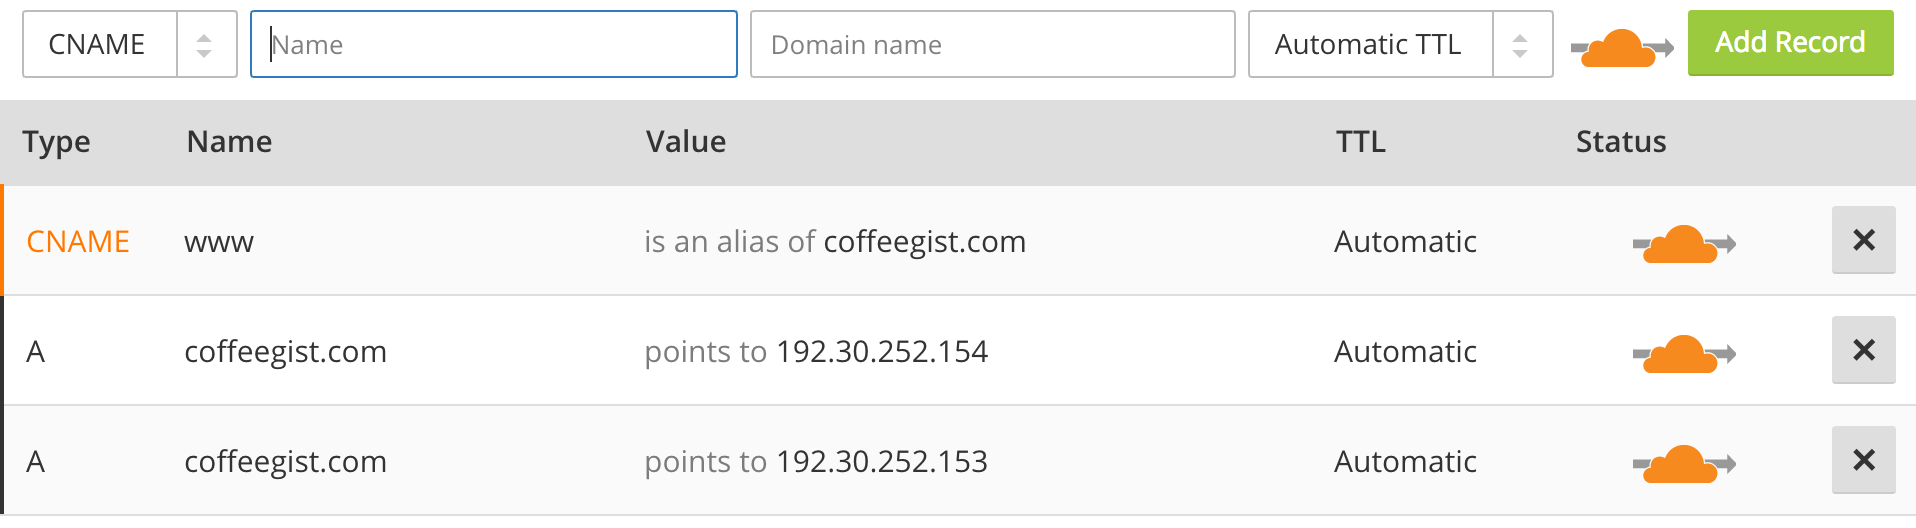
A Records
An A record maps a domain name to an IPv4 address. We will need to create an A record for your domain that points to Github’s servers, 192.30.252.153, and 192.30.252.154. These addresses were obtained here.
CNAME Records
A Canonical Name or CNAME record is a type of DNS record that maps an alias name to a true or canonical domain name. CNAME records are typically used to map a subdomain such as www or mail to the domain hosting that subdomain’s content. We will use it for mapping www to our origin, or root name, @. Upon hitting save, the @ will be translated into your root domain name automatically. In the end, your DNS records should look similar to the ones above.
Select a Cloudflare Plan
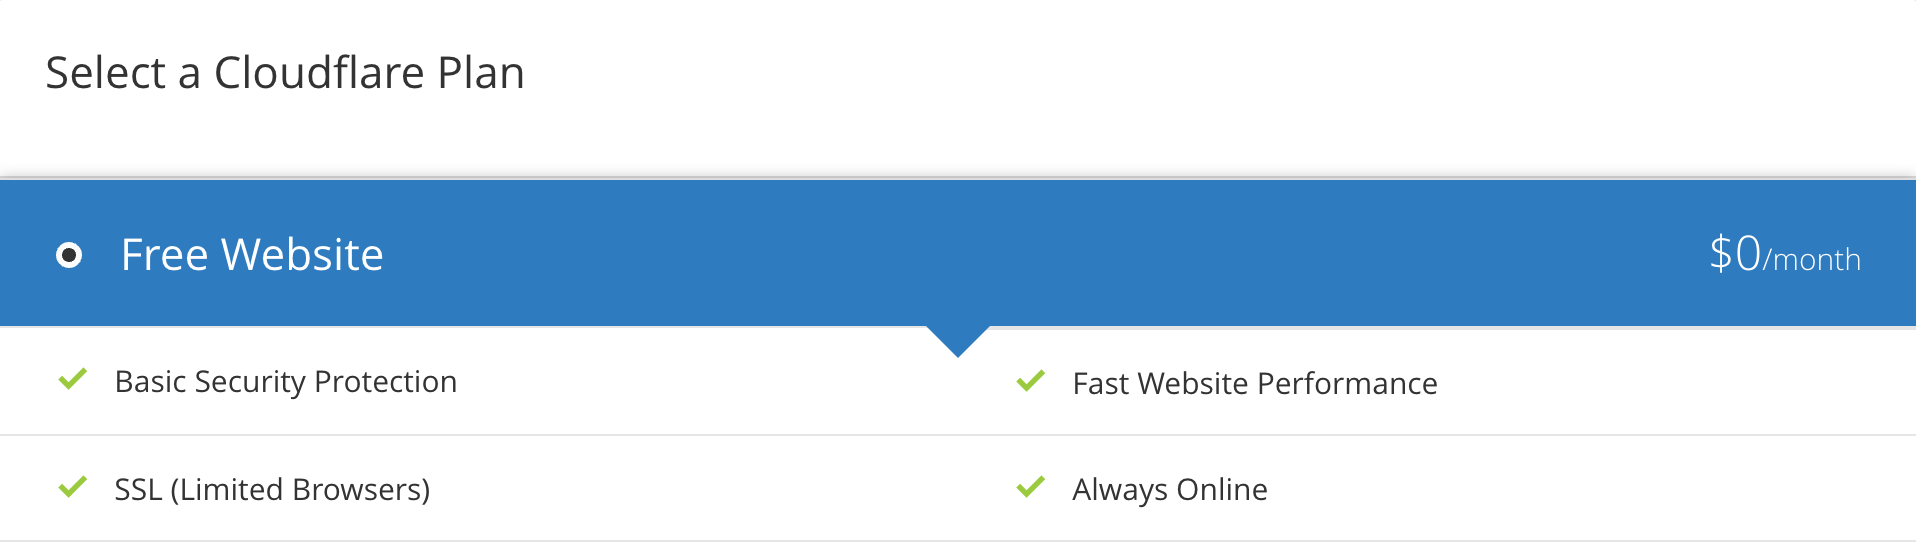
🎶 It’s all about the money, money, money! 🎶
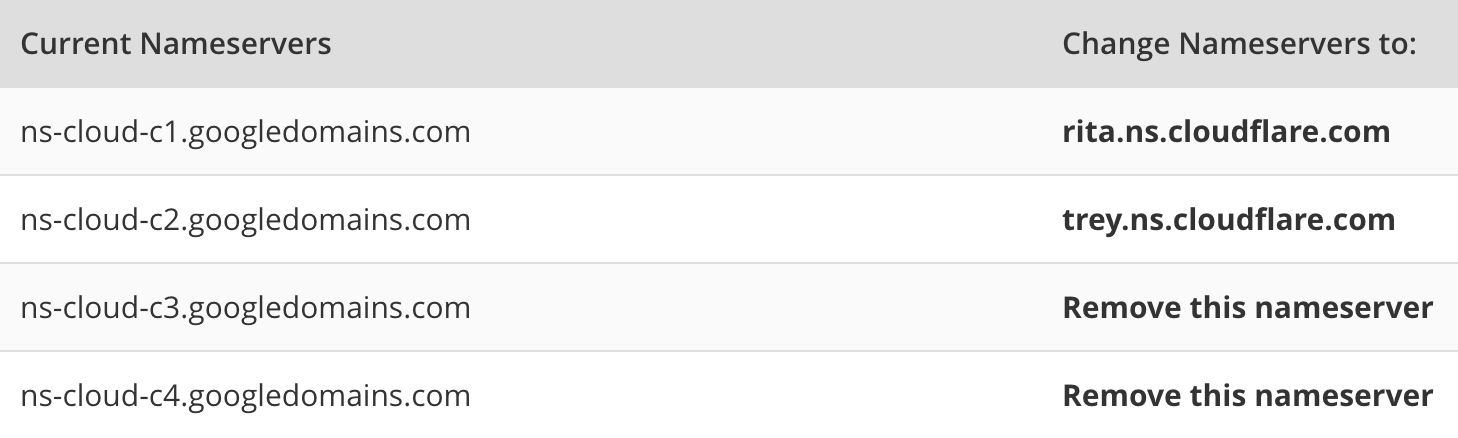
Set New Nameservers
Cloudflare will now ask you to change your domain’s name servers over from Google to Cloudflare.
Changing Your Nameservers
The changes can be made by clicking on the Configure DNS button in your Google Domains account. Under the Name servers section, you should select Use custom name servers and fill in the name servers provided to you by Cloudflare. In my case, the result looked like this.

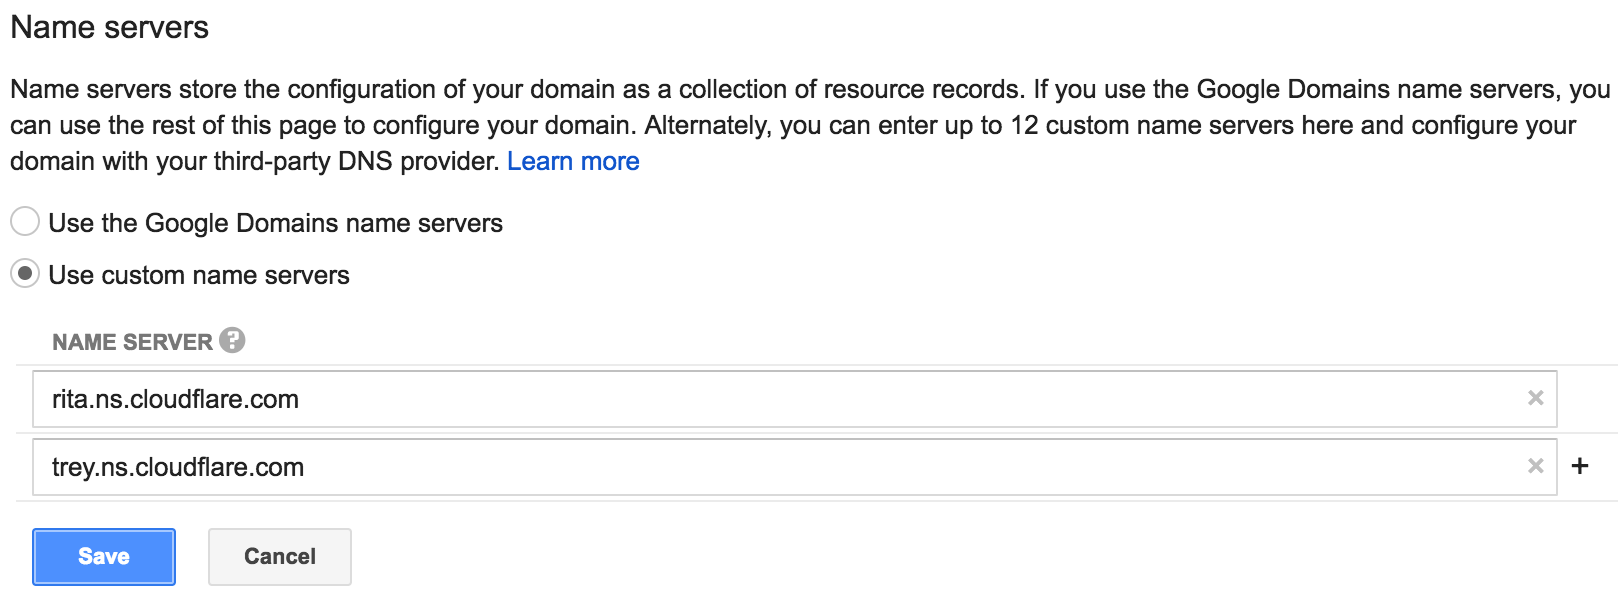
Note that the above changes could take up to 24 hours to take effect, but they usually happen within minutes.
Final Cloudflare Settings
There are a few Cloudflare settings you’ll want to set to ensure that users connections will always use HTTPS. These settings can all be found on the Crypto tab of your Cloudflare site page.
-
SSL - Full
-
Always Use HTTPS - On
-
Enable HSTS - On (Read the warning carefully)
-
Automatic HTTPS Rewrites - On (Strongly encouraged)
That’s a Wrap!
You can now visit your site using any normal means, and you should end up seeing a secured session signed by a trusted certificate to your custom domain name! Now go share your ideas with the world. Happy Hacking!